Add a New Alarm (Tag Expiration Alarm)
To add a new alarm, perform the following steps:
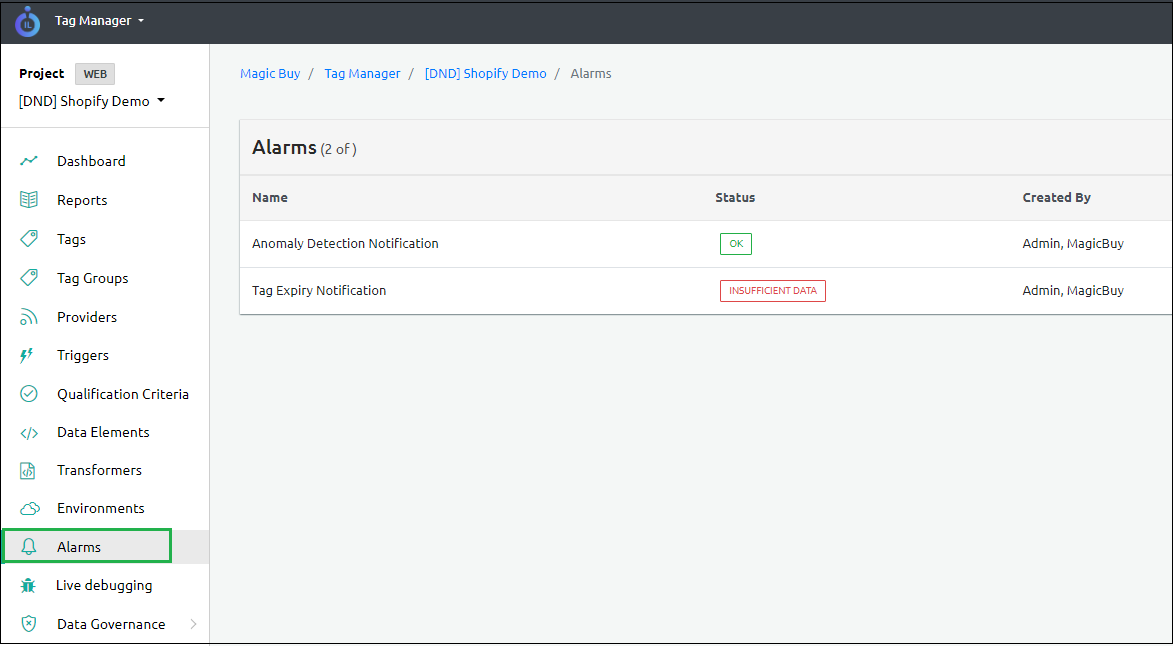
- Select Alarms from the left navigation panel.
- Click Add Alarm on the top-right corner of the screen.
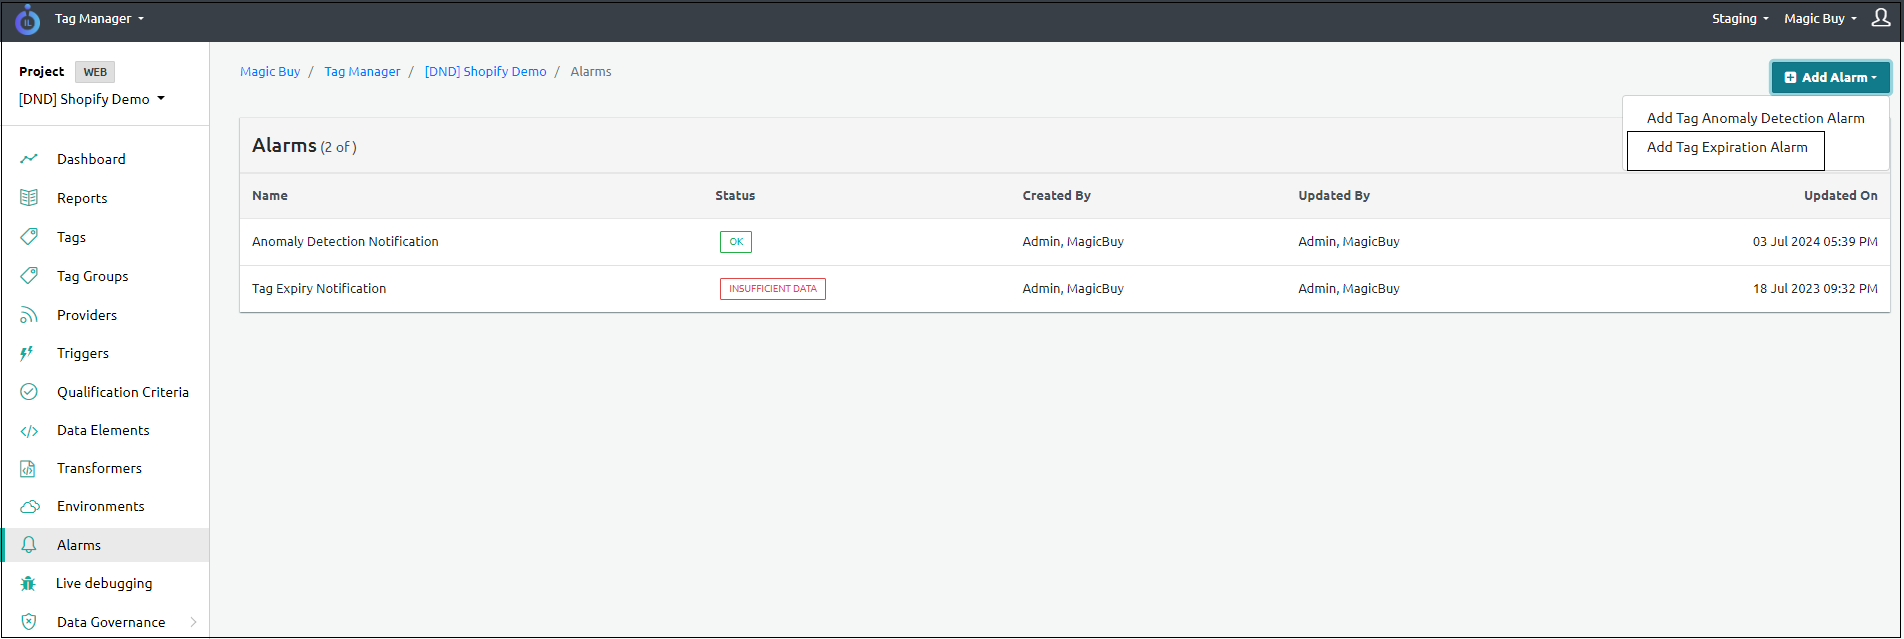
- Select Tag Expiration Alarm.
Step Result: The New Tag Expiration Alarm screen appears.
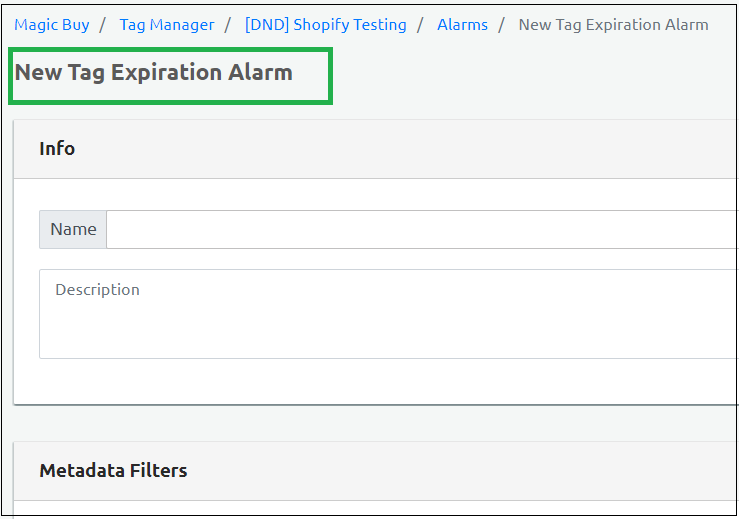
- Enter the following details in the New Tag Expiration Alarm screen.
| Field Name | Description |
|---|---|
| Name | The Alarm Name. |
| Description | Enter the description of the Alarm. The description must be more than five characters. |
| Metadata filters | Select filters to make the alarms more specific and monitor specific tag groups. |
- Enter the details mentioned in the Settings section.
a. Tag Expiry Lookback (in Days): Send tag expiration notification before the tag expires. You can choose five durations during which the alert should be sent. The number of days must be between 1-180.
b. Report Time: Select the time to trigger the tag expiration alarm. The timezone is set according to the user timezone.
Select Destination.
Select Notification Group: The tag expiration alert is sent to the contacts configured in the selected notification group. In this step, you can select the check boxes or search for a particular group.
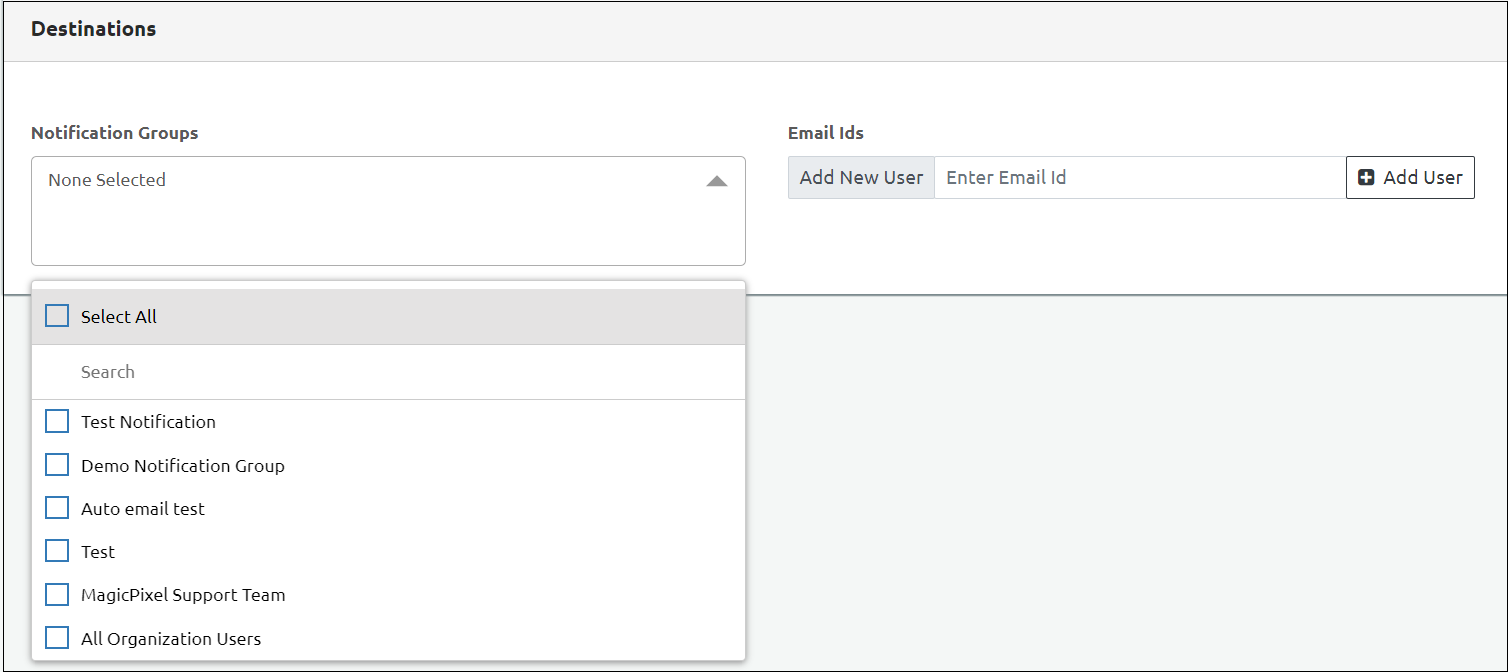
Provide Email ID: Enter the e-mail IDs to send the tag anomaly notification. You can add users using the Add Users tab.
Click Save to save the settings.