Edit Pipeline Data Source Schema
After creating a pipeline, you can edit the Data Source Schema to define the format of the data to be extracted from the data source or the segment for exporting.
To edit a Pipeline, perform the following steps:
Step 1: From the left navigation panel, select Pipelines.
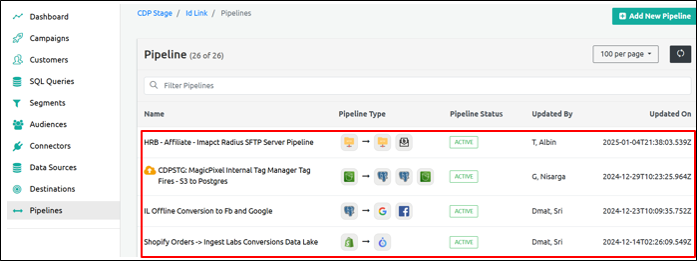
Step 2: Click the pipeline you want to edit.
Step 3: Click Data Source Schema.
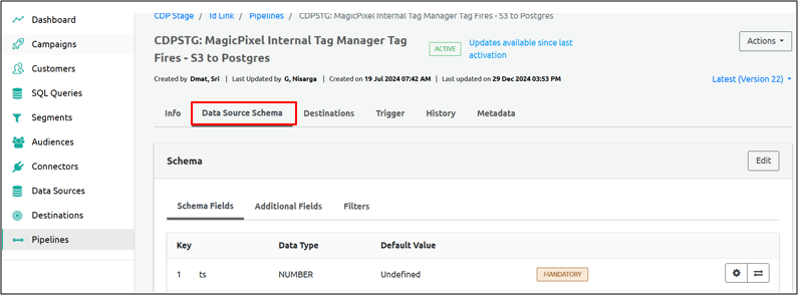
Step 4: Under Schema, the following fields are available:
Schema Fields
Additional Fields
Filters
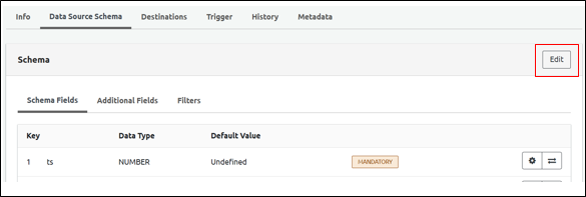
Step 5: Click Schema Fields.
Step 5.1: Click the Edit button, which is located to the right of the Schema Fields section.
Step 5.2: Scroll down and click Add New Field.
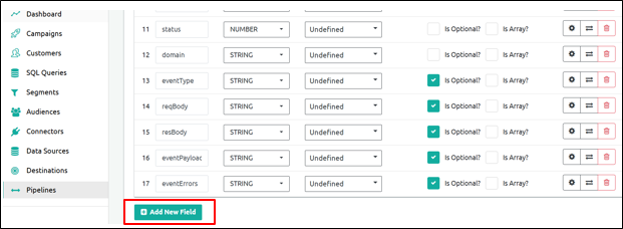
Note: You can add any number of Schema Fields to the Data Source Schema.
Step 5.3: Perform the following actions:

Step 5.4: Key.
If the pipeline type is Segments, select from the Key dropdown menu.
If the pipeline type is Data Source, type a key.
Step 5.5: The String Data Type is the default data type for the Segments pipeline. Select one of the following data types for the Data Source pipleline:
NUMBER
STRING
BOOLEAN
JSON
JSON STRING
Date
TIMESTAMP
Step 5.6: Select the Default Value from the following:
Undefined
Null
Custom Value
Step 5.7: By default, the Optional checkbox is selected. Unselect it to make it a mandatory field.
Step 5.8: Array: When the data type is String, Boolean, JSON, or JSON String, ensure that the Array checkbox is checked.
Step 5.9: Click the Settings icon to add the following validations.
Minimum and maximum length
Pattern
Allowed Values
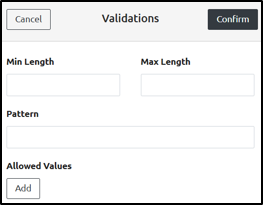
Step 5.10: Click Confirm to save the validations.
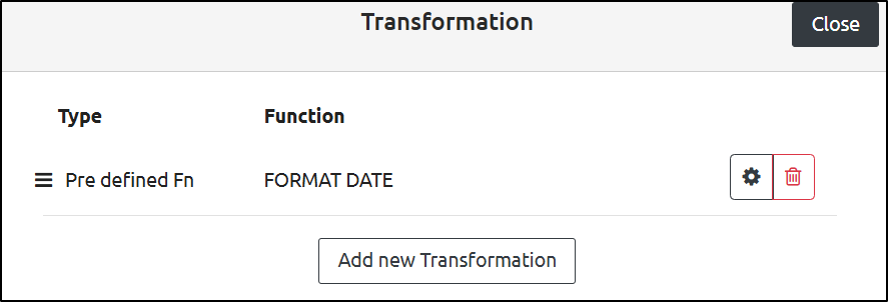
Step 5.11: Click the Transformation icon to add transformations to the Data Source Schema.
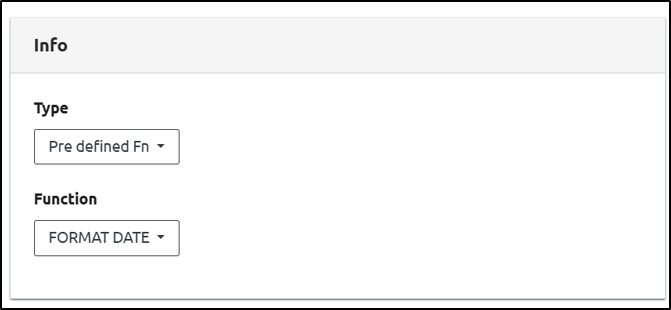
Step 5.11.1: Opens the Transformation panel on the right side and click Settings. Under the Info , two options will be available:
Type
Function
Select the appropriate one.
Step 5.11.2: Under Type, the following options are available:
Pre-Defined
Custom.
Step 5.11.3: The pre-defined functions are as follows:
Format Data
To Bool
To Number
URL Encode
Base64 Encode
SHA265 Hash
Base64 Decode
Step 5.11.4: In the case of Custom Functions, denote the code.
Step 5.11.5: Click Confirm.
Step 5.11.6: Step Result - Data source is created successfully.
Note: You can add any number of transformations in the Schema Fields. To update a transformation, click the settings icon next to it. To delete a transformation, click the delete icon next to the transformation function.
Step 6: Click Additional Fields.
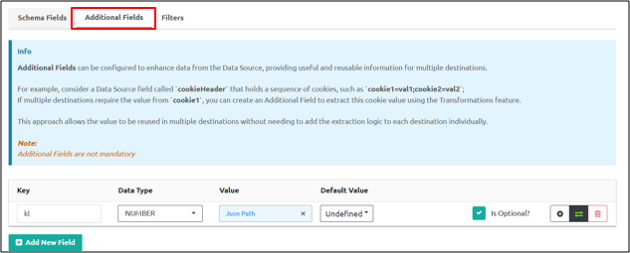
Step 6.1: Enter the appropriate value in the Key field.
Step 6.2: Under Data Type, the following options are available. Select the appropriate one:
NUMBER
STRING
BOOLEAN
DATE
Step 6.3: Under the Value field, the following options are available. Select the appropriate one:
Source Field
Function
JSON Path
URL Param
Step 6.4: By default, the Optional checkbox is selected. Unselect it to make it a mandatory field.
Step 6.5: Opens the Transformation panel on the right side and click Settings. Under the Type dropdown, two options will be available:
Pre-defined and
Custom.
Select the appropriate one.
Step 6.5.1: The pre-defined functions are as follows:
Format Data
To Bool
To Number
URL Encode
Base64 Encode
SHA265 Hash
Base64 Decode
Step 6.5.2 In the case of Custom Functions, denote the code.
Step 6.5.3: Click Confirm.
Step Result : Data source is created successfully.
Step 7: Clck Filters

Step 7.1: When you check the Enable Filter box, the Function tab opens.
Step 7.2: Under the Type dropdown, the following options are available:
Pre-Defined Fn
Custom Fn
Select the appropriate one.
Follow these steps 4.9.2 and 4.9.3 for Pre-Defined Fn and Custom Fn to proceed further.