Add a Data Source
To add a new Data Source, follow these steps:
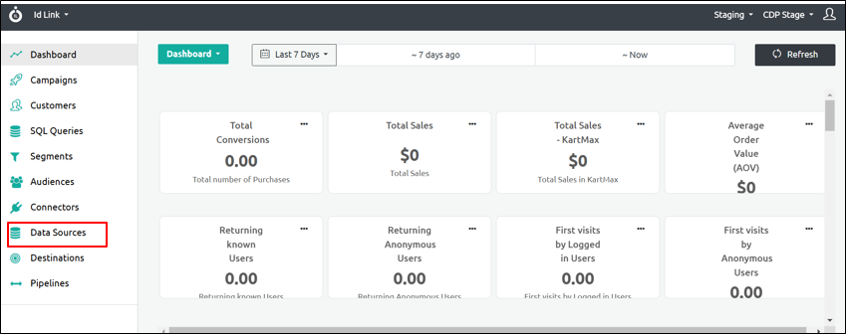
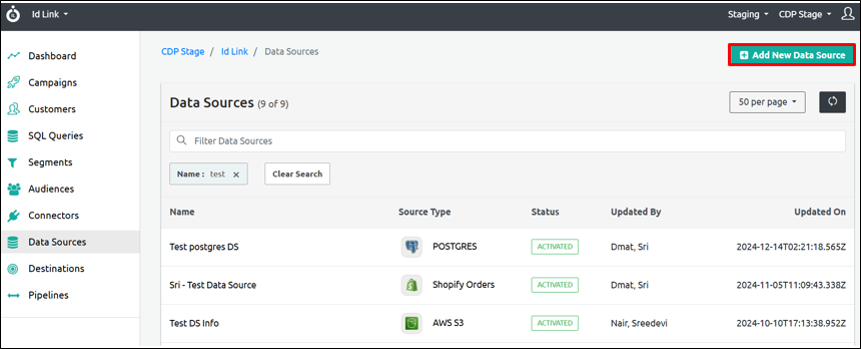
Step 1: In the left navigation panel, click Data Source.
Step 2: Select Add New Data Source located at the top-right corner of the screen.
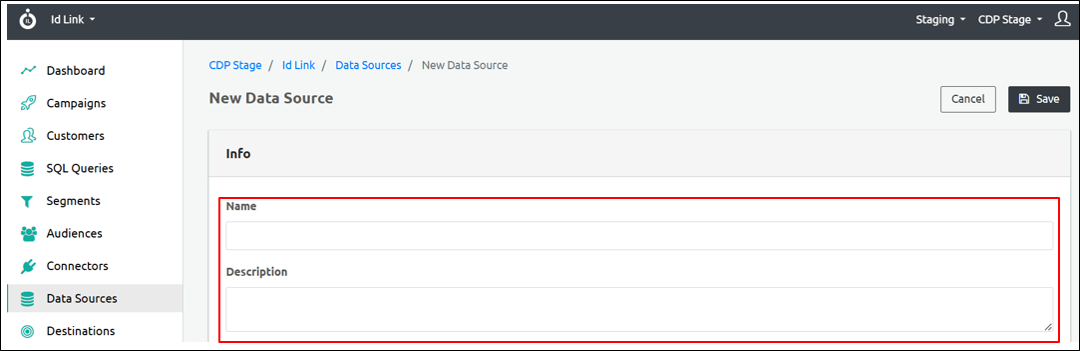
Step 3: In the Name field, enter the name of the Data Source.
Step 4: In the Description field, enter a brief description of the Data Source.
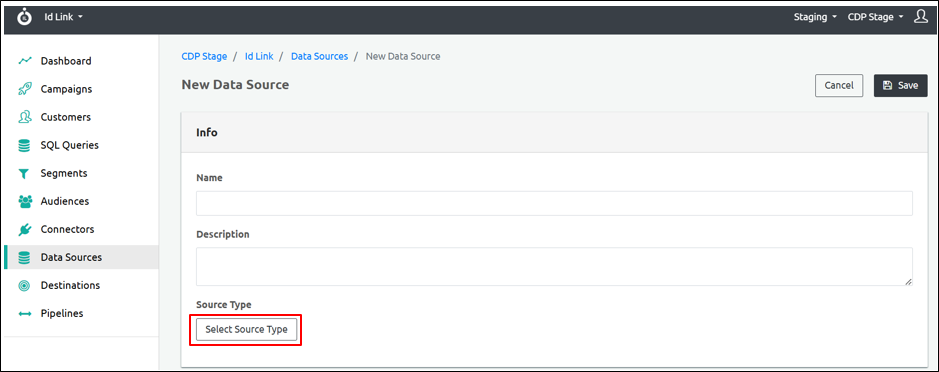
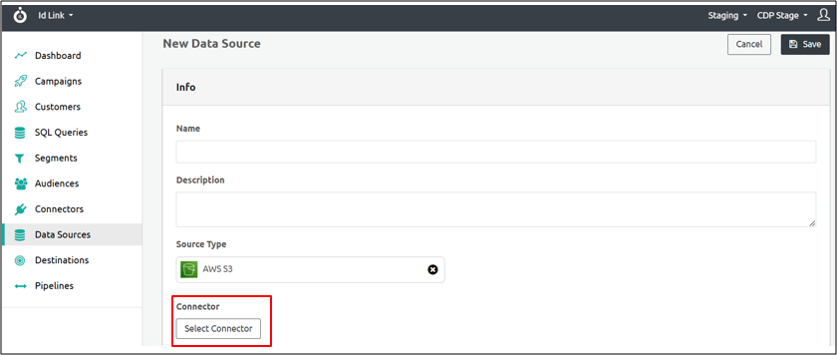
Step 5: Under the Source Type section, click Select Source Type to choose the appropriate option.
Step 6: This will open a list of available Source Types on the right-hand side. Select the appropriate Source Type for your needs. The available options include:
Cloud Storage
File Storage
Database
Facebook
Shopify
Database
Overview of Source Types
Cloud Storage
 Click AWS S3.
Under the Connector section, click Select Connector to choose the appropriate option.
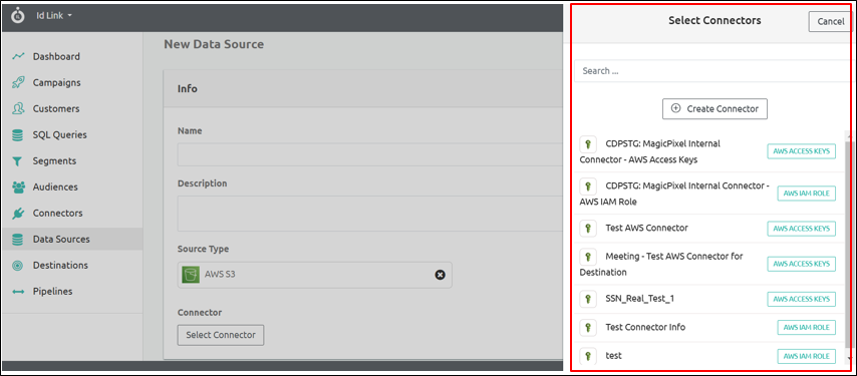
When you click Select Connector, a Select Connectors panel opens on the right-hand side. You can either search and select a connector or create a new connector by clicking Create Connector.
Choose the appropriate connector.
Destination Properties
Under AWS Region, click the Select dropdown and choose the appropriate region.

Click the Bucket Name field to enter the appropriate name.
Click the Object Key field to enter the appropriate key.

Data Format
Under the Data Format field, in the Format Type section, click the Select dropdown to choose the appropriate option.

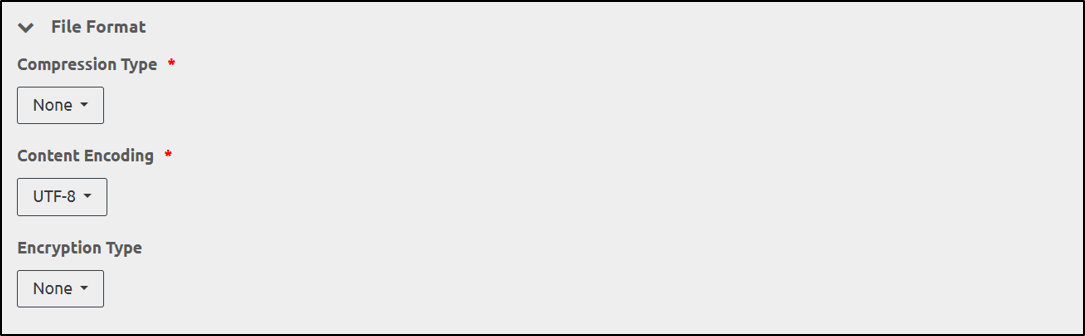
File Format
Under Compression Type, click the dropdown to select the appropriate option.
Under Content Encoding, click the dropdown to select the appropriate option.
Under Encryption Type, click the dropdown to select the appropriate option.
File Storage
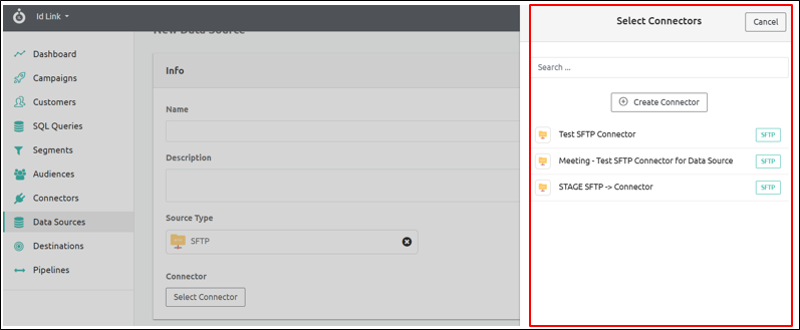
 Click SFTP.
Under the Connector section, click Select Connector to choose the appropriate option.
When you click Select Connector, a Select Connectors panel opens on the right-hand side. You can either search and select a connector or create a new connector by clicking Create Connector.
Data Source Properties
Click the Directory Path field to enter the appropriate path.
Click the File Pattern field to enter the appropriate pattern.

Data Format
Under the Data Format field, in the Format Type section, click the Select dropdown to choose the appropriate option.
File Format
Under Compression Type, click the dropdown to select the appropriate option.
Under Content Encoding, click the dropdown to select the appropriate option.
Under Encryption Type, click the dropdown to select the appropriate option.
Database
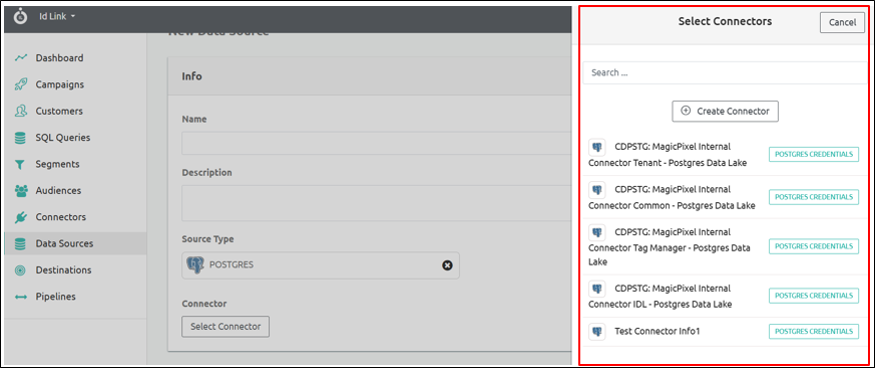
 Click POSTGRES.
When you click Select Connector, a Select Connectors panel opens on the right-hand side. You can either search and select a connector or create a new connector by clicking Create Connector.
Data Source Properties
Under the Database Engine field, click the dropdown to select the appropriate option.
In the SQL Query field, enter the appropriate query.

Placeholders
Under the Placeholders section, click Add.

Click the Name field to enter the name of the placeholder.
Click the Value field to enter the appropriate value.

Click the Data Type dropdown to select the appropriate option.

Click the Is an Array? field dropdown to select the appropriate option.

Note: By clicking Add More, you can add more items.
Timestamp Column (To fetch delta set of records)
Click the Table Name field to enter the appropriate name.
Click the Column Name field to enter the appropriate name.

Data Format
Under the Data Format field, in the Format Type section, click the Select dropdown to choose the appropriate option.
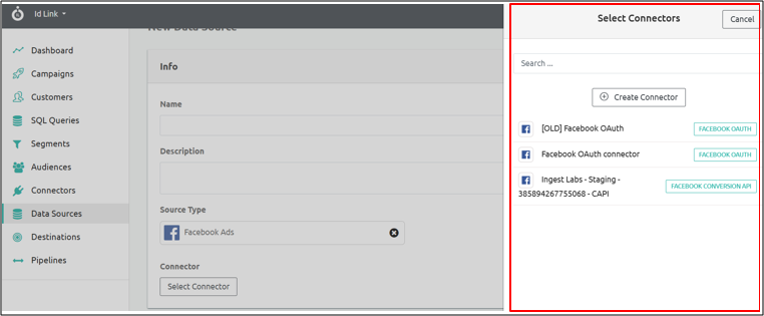
 Click Facebook Ads.
When you click Select Connector, a Select Connectors panel opens on the right-hand side. You can either search and select a connector or create a new connector by clicking Create Connector.
Data Source Properties
Click the Fields section to enter the appropriate information.

Click the Level dropdown to select the appropriate option.

Click the Time Increment (in days) field to enter the appropriate value.

Data Format
Under the Data Format field, in the Format Type section, click the Select dropdown to choose the appropriate option.
File Format
Under Compression Type, click the dropdown to select the appropriate option.
Under Content Encoding, click the dropdown to select the appropriate option.
Under Encryption Type, click the dropdown to select the appropriate option.
Shopify
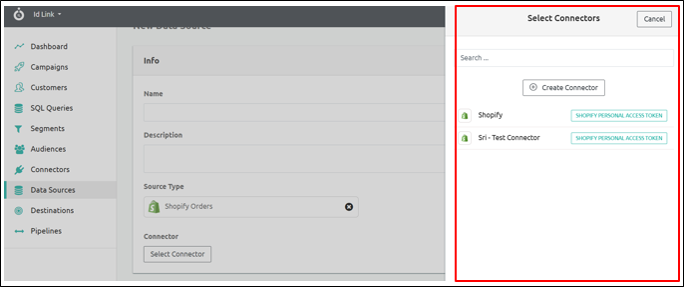
 Click Shopify Orders.
When you click Select Connector, a Select Connectors panel opens on the right-hand side. You can either search and select a connector or create a new connector by clicking Create Connector.
Data Source Properties
Click the Domain field to enter the appropriate domain.

Click the API Version dropdown to select the appropriate option.

Click the Backdated Orders History (in days) field to enter the appropriate number of days.

Data Format
Under the Data Format field, in the Format Type section, click the Select dropdown to choose the appropriate option.
Database
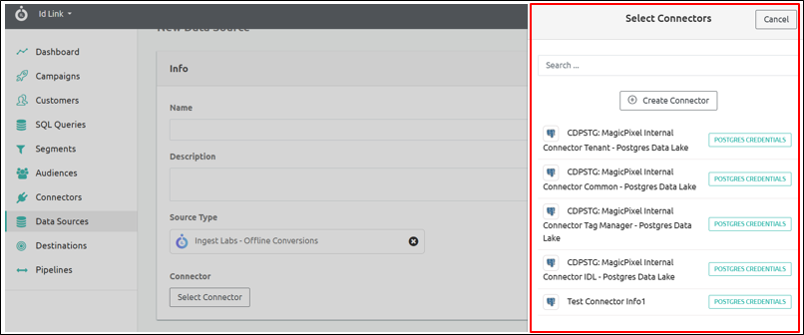
 Click Ingest Labs - Offline Conversions.
When you click Select Connector, a Select Connectors panel opens on the right-hand side. You can either search and select a connector or create a new connector by clicking Create Connector.
Data Source Properties
Click the Engine Name field dropdown to select the appropriate option.

Click the Table Name field to enter the appropriate name.

Data Format
Under the Data Format field, in the Format Type section, click the Select dropdown to choose the appropriate option.
Once you have entered all necessary information, click the Save button to save the Data Source you’ve created.