Edit a Connector
You can edit the Target System, Destination, Properties, and Metadata of a connector using this option.
To edit a Connector, perform the following steps:
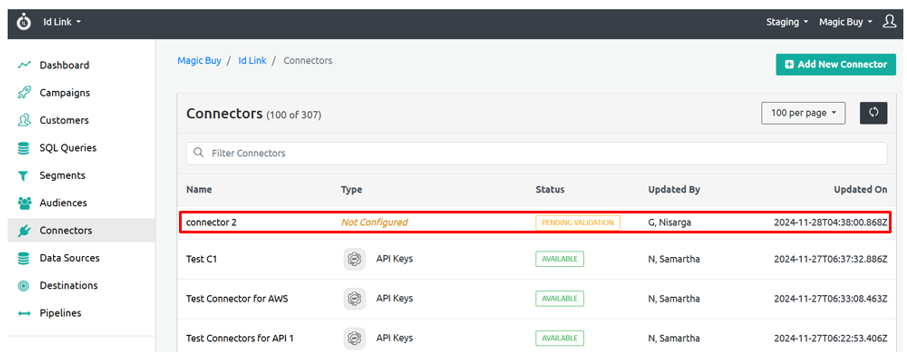
Step 1: From the left navigation panel, select Connectors.
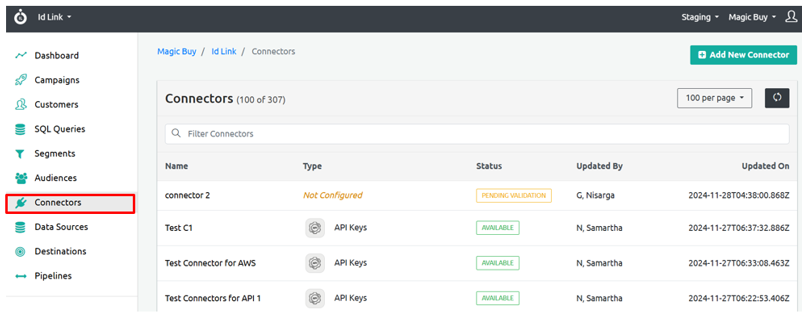
Step 2: Select the Connector you want to edit and click on it.
Step 3: You will see the following fields displayed: Info, Properties, and Metadata.
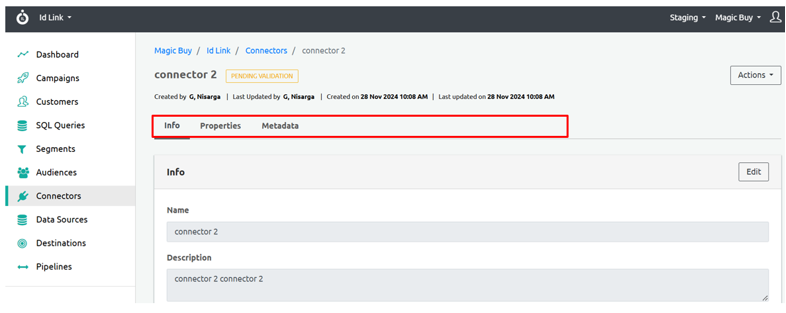
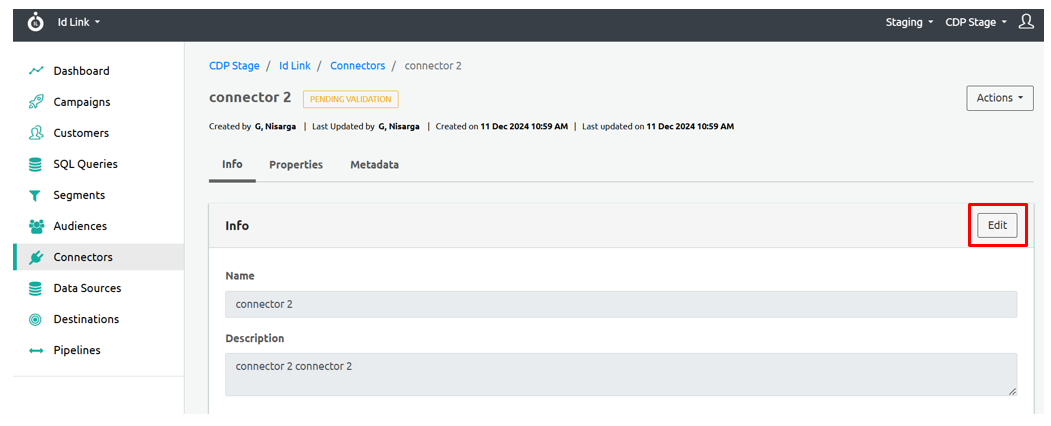
Step 4: Click Info.
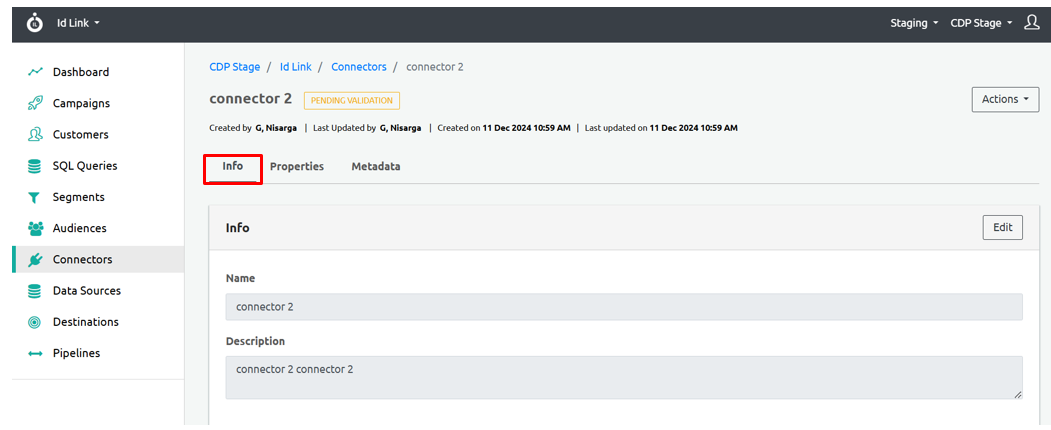
Step 4.1: Click Edit button which is available right side to modify the Name and Description fields.
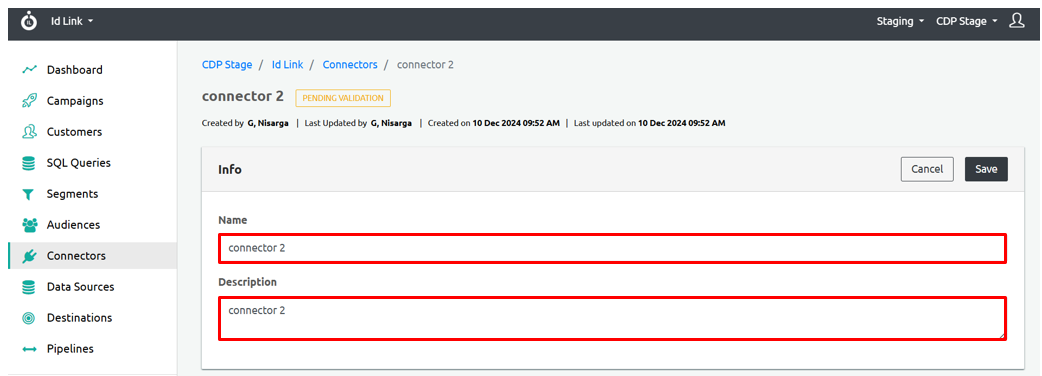
Step 4.2: Click the Save button to save your changes.
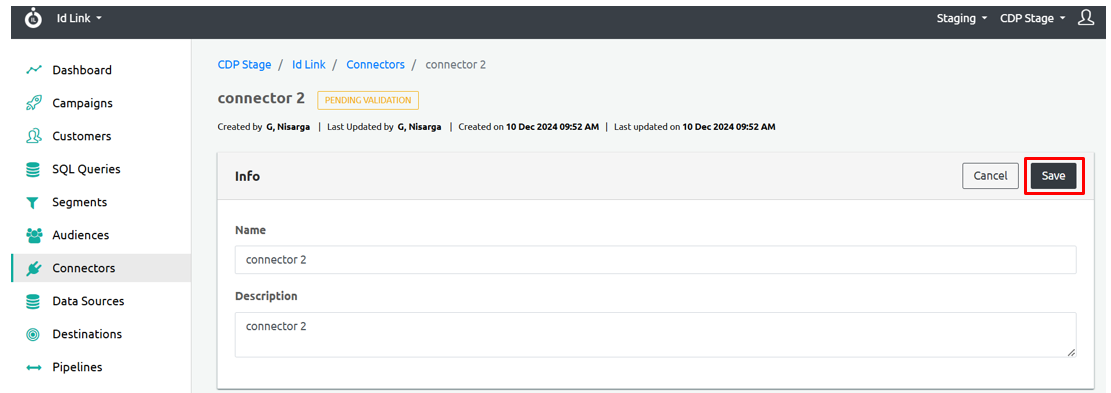
Step 4.3: A popup will appear stating Connector was updated successfully, confirming that the connector has been updated.

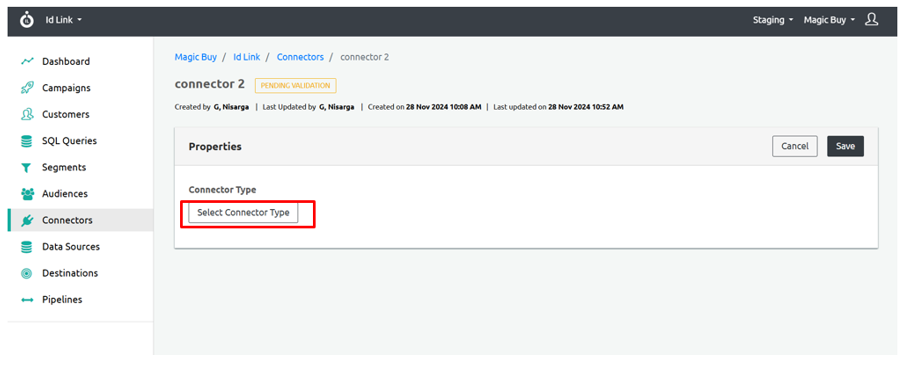
Step 5: Click Properties.
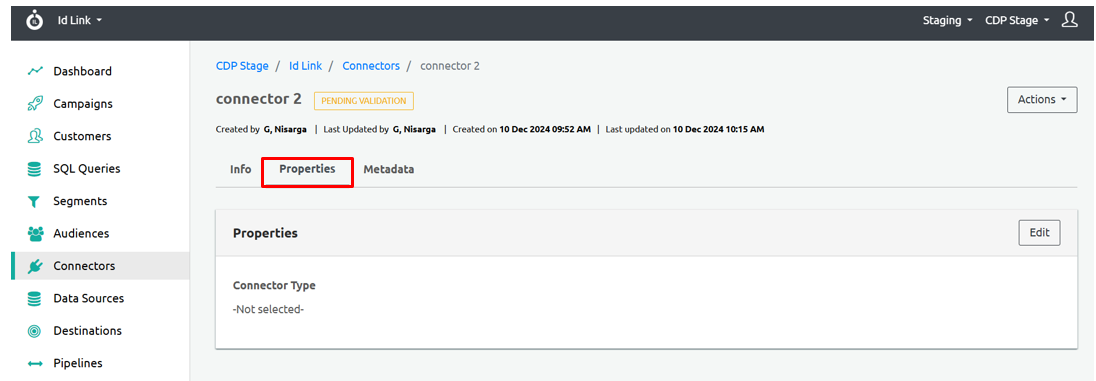
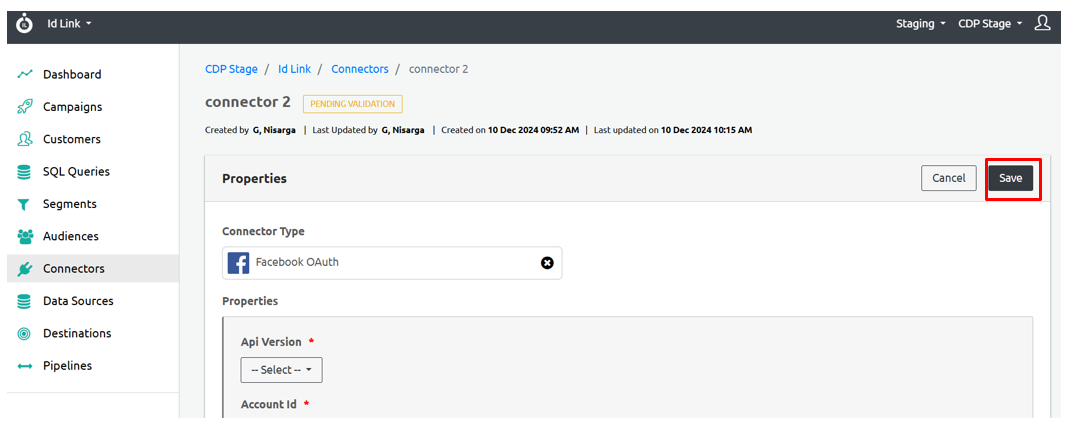
Step 5.1: Click Edit.

Step 5.2: Click Select Connector Type to choose the appropriate option.
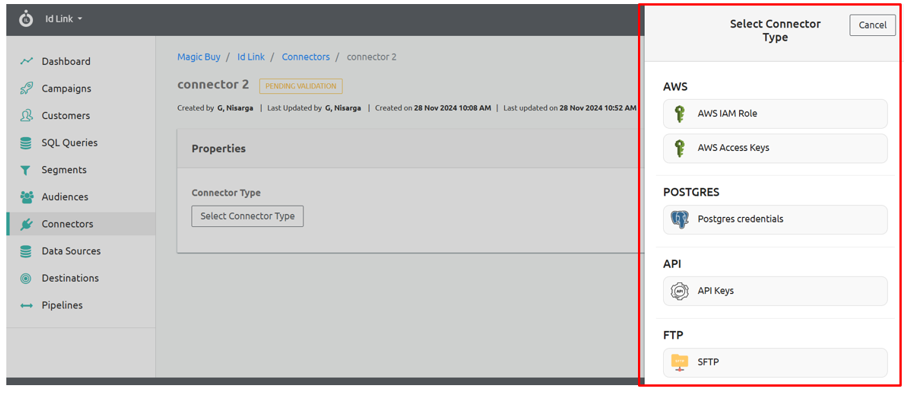
Step 5.3: A list of available connector types will be displayed on the right side, including AWS, POSTGRES, API, FTP, EMAIL, Facebook, Shopify, and Google.
Select the desired connector type.
Overview of Connector types
AWS
 AWS IAM Role
To connect the AWS IAM Role, click AWS IAM Role. Under Properties, you will see the Access IAM ARN field. Enter the required value in this field.
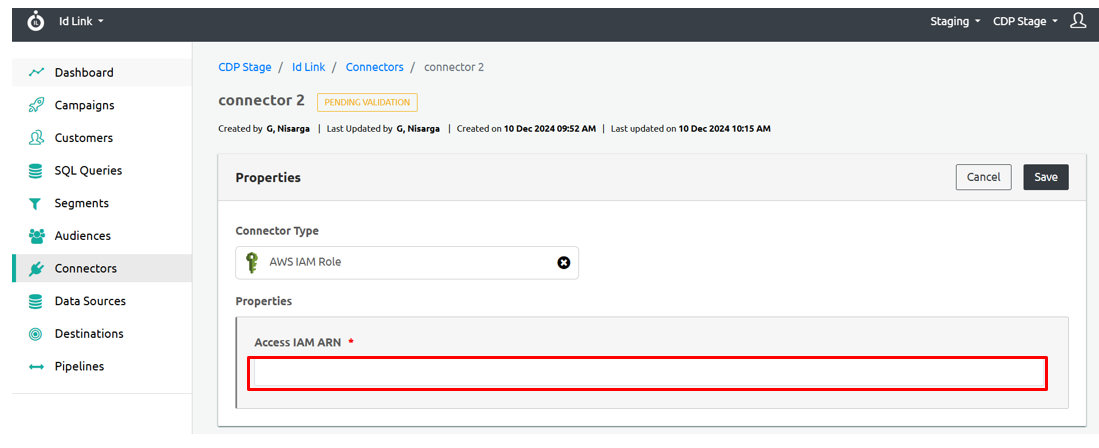
Note: Fields marked with an asterisk (*) are mandatory.
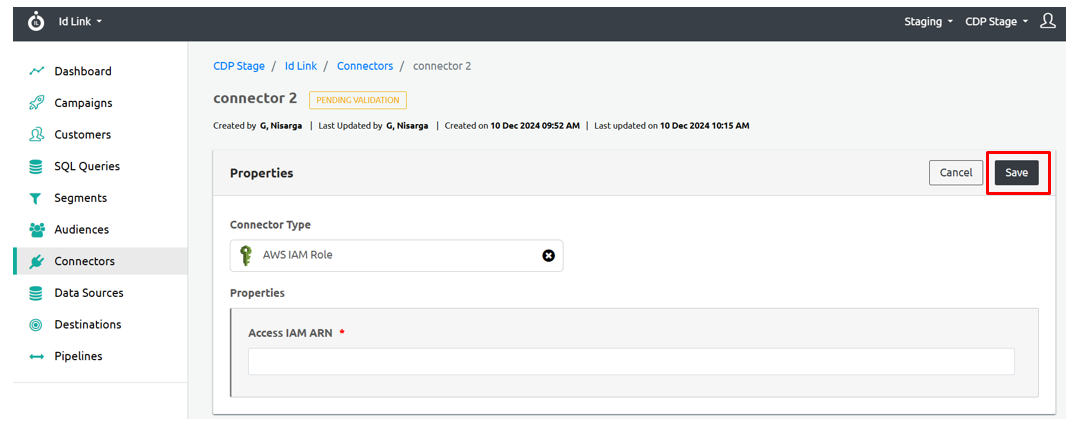
Click Save to save the changes.
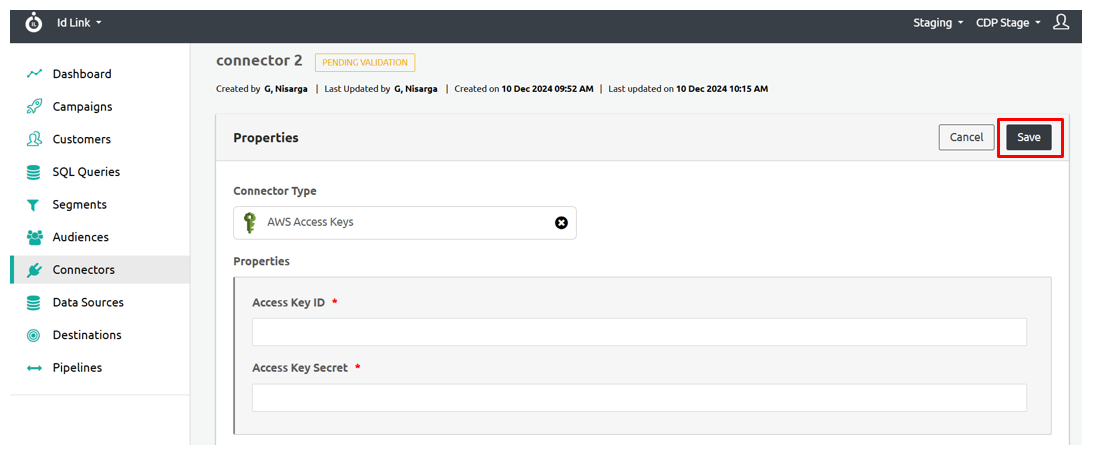
AWS Access Keys
To connect the AWS Access Keys, click AWS Access Keys. Under Properties, you will see the Access Key ID and Access Key Secret fields. Enter the required values in these fields.
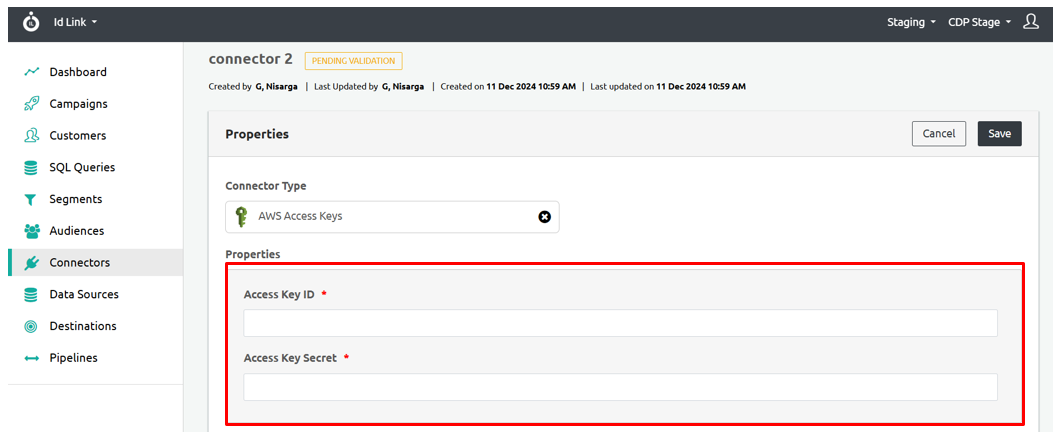
Click Save to save the changes.
POSTGRES
 Postgres credentials
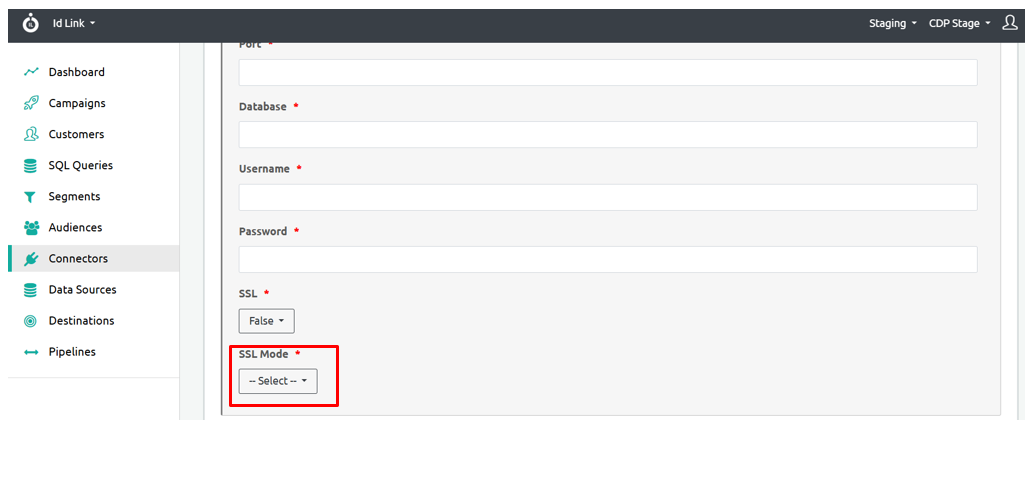
To connect Postgres credentials, click Postgres credentials. The following fields will be displayed:
- Host: Enter the Postgres server IP address.
- Port: Enter the port number where Postgres is running.
- Database: Enter the name of the database to connect to.
- Username: Enter the Postgres username.
- Password: Enter the Postgres password associated with the username.
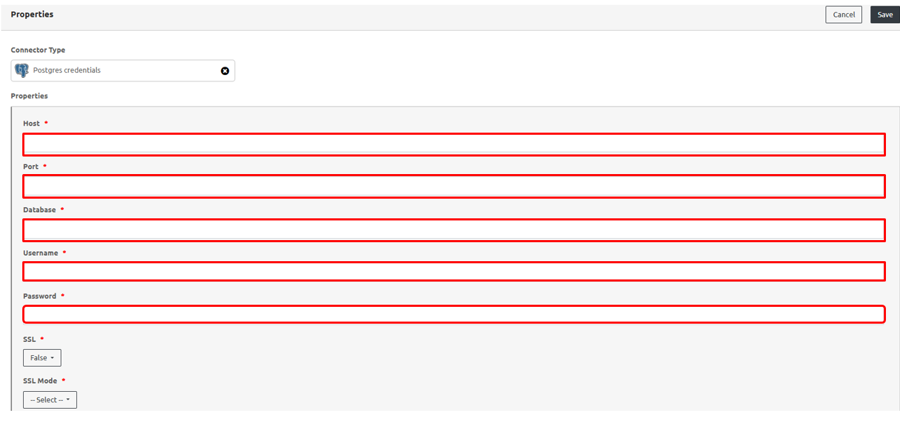
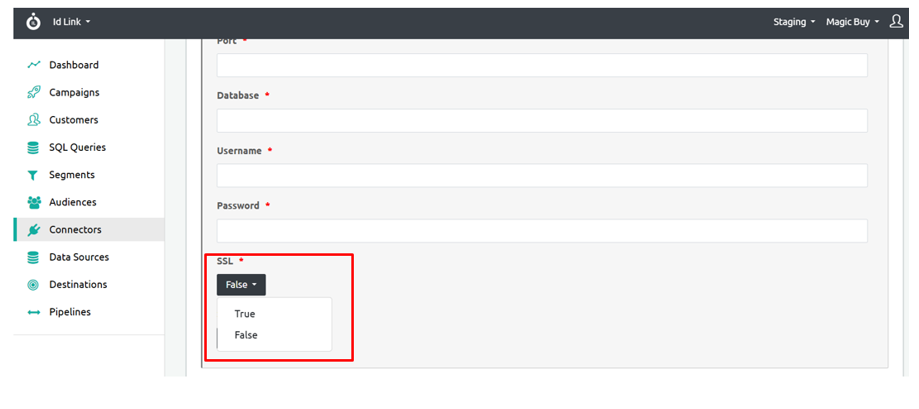
SSL: Specify if SSL is required for the connection.
- True
- False
SSL Mode: Choose the appropriate SSL mode.
- DISABLE
- VERIFY-CA
- ALLOW
- REQUIRE
- PREFER
- VERIFY-FULL
Click Save to save the changes.

API
 API Keys
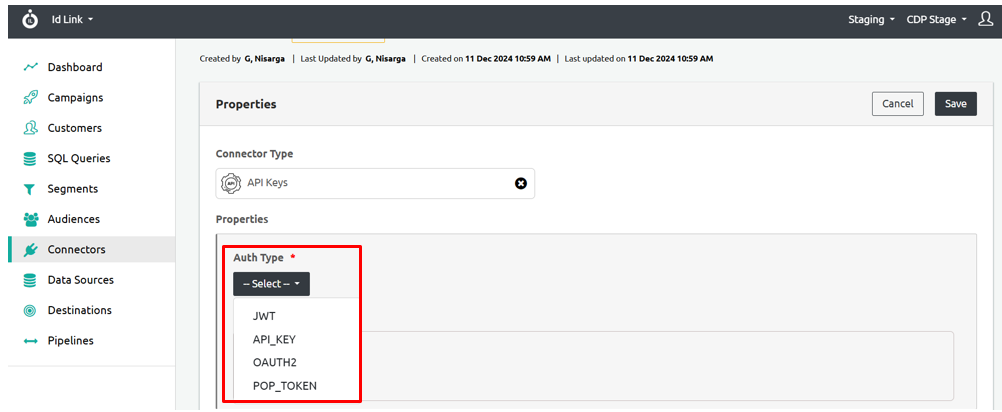
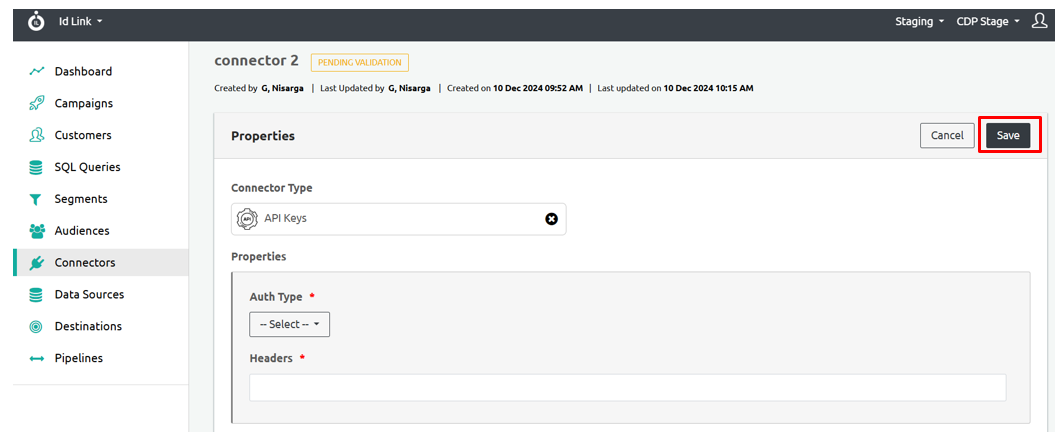
To connect the API Keys, click API Keys. Under Properties, in the Auth Type field, click the Select dropdown. You will see the following options. Select the appropriate authentication type.
- JWT
- API_KEY
- OAUTH2
- POP_TOKEN
Click on Headers, which is the next field, to provide the necessary headers.
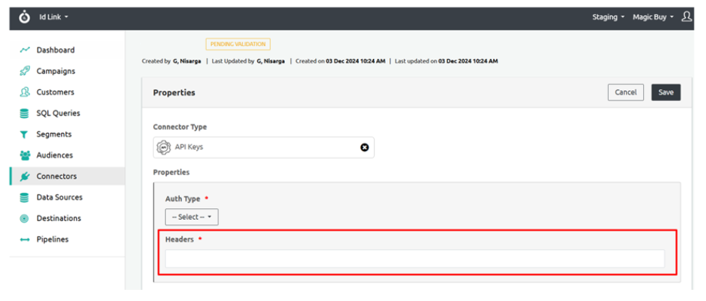
Click Save to save the changes.
FTP
 Connect SFTP
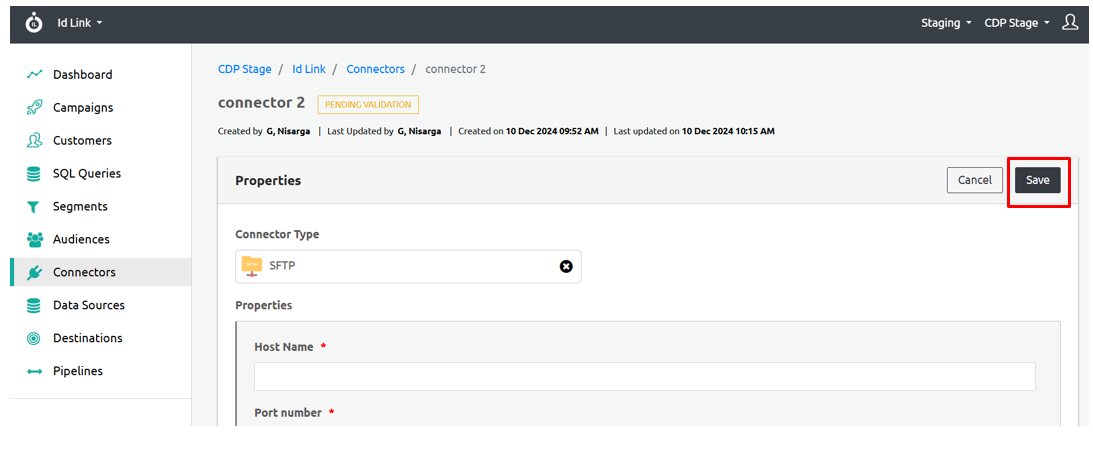
To connect SFTP, click SFTP. The following fields will be available:
Host Name: Enter the hostname of the SFTP server.
Port Number: Enter the port number for the SFTP connection.
User Name: Enter the username for authentication.
Login Method: Click the Login Method dropdown. You will see two options:
- Password: Select this option if you want to authenticate using a password.
- Password Key: Select this option if you want to authenticate using a password key.
Login ssh Private Key: Enter the path to the ssh private key.
Login ssh Private Key Password: Enter the password for the private key.
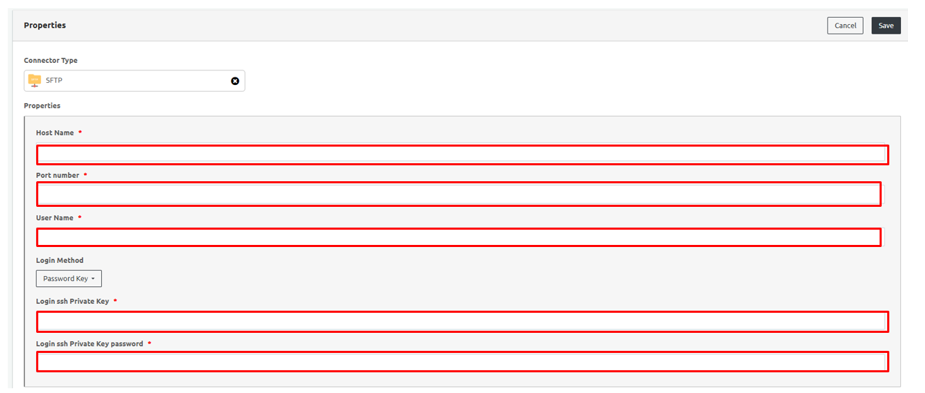
Click Save to save the changes.
 EMAIL SMTP
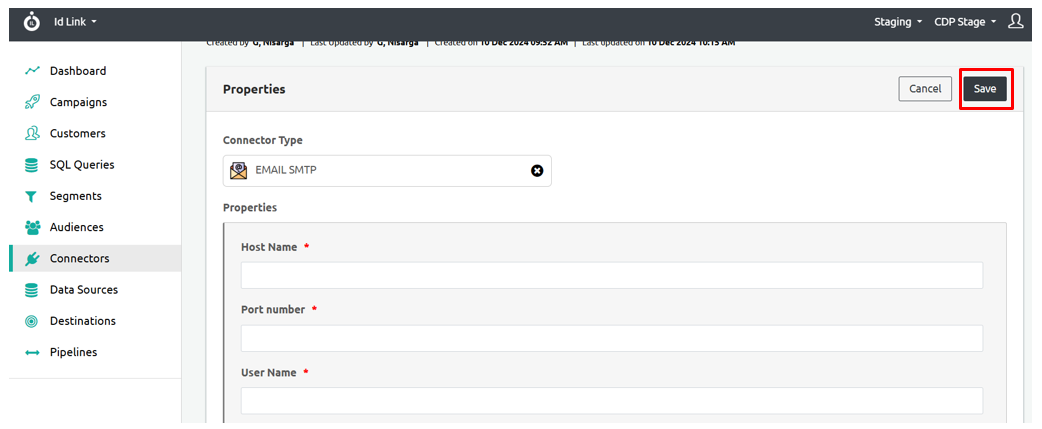
To connect EMAIL SMTP, click EMAIL SMTP. The following fields will be available:
- Host Name: Enter the SMTP server hostname.
- Port Number: Enter the SMTP server port number.
- Port Number: Enter the SMTP server port number.
- User Name: Enter the username for SMTP authentication.
- Login Password: Enter the password associated with the SMTP username.
- Sender Email ID: Enter the email address from which the emails will be sent.
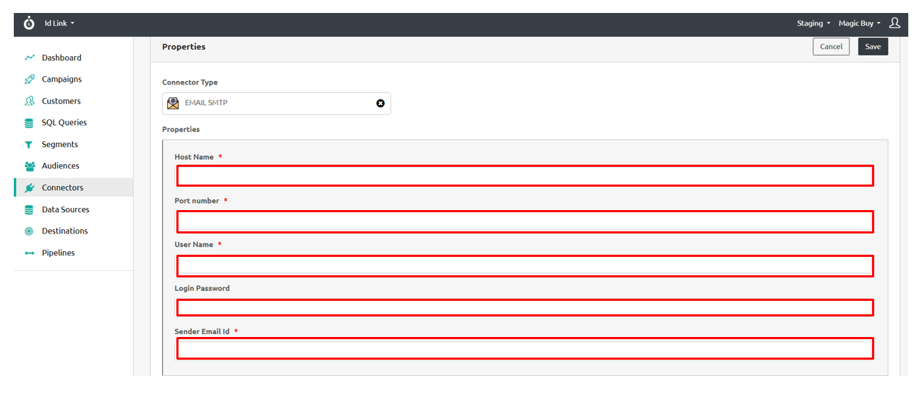
Click Save to save the changes.
Ingest Labs Email Sender
Click the Token section to enter the appropriate details.

 Connect Facebook OAuth
To connect Facebook OAuth, click Facebook OAuth. The following fields will be available:
API Version: Click the API Version dropdown and select the appropriate version. Available options are:
- v17.0
- v20.0
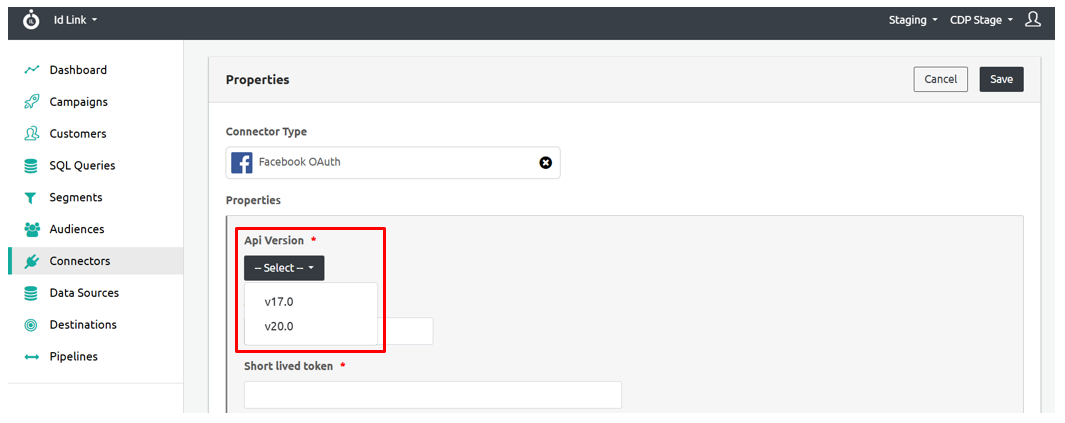
Account ID: Enter the Facebook account ID.
Short Lived Token: Enter the short-lived token for authentication.
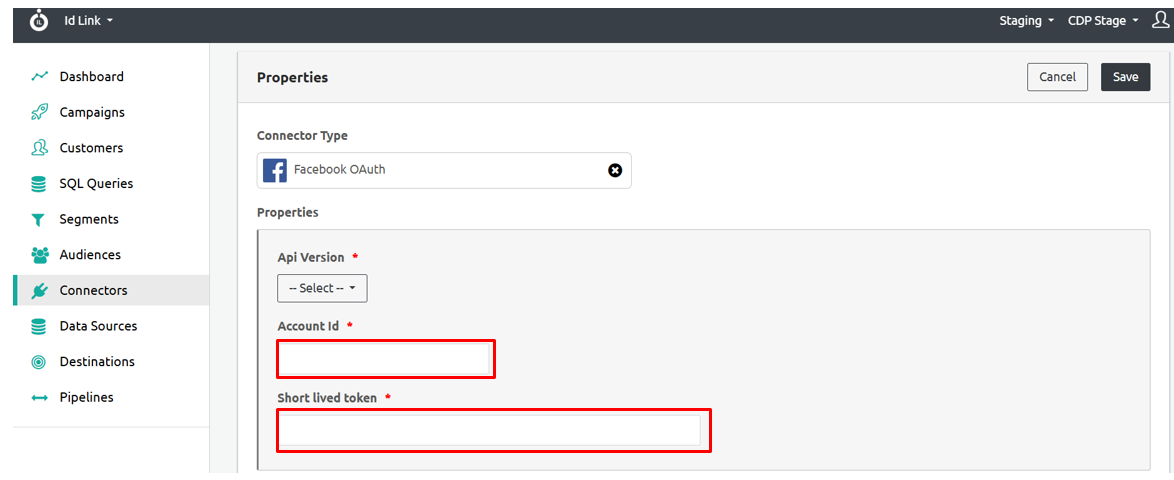
Click Save to save the changes.
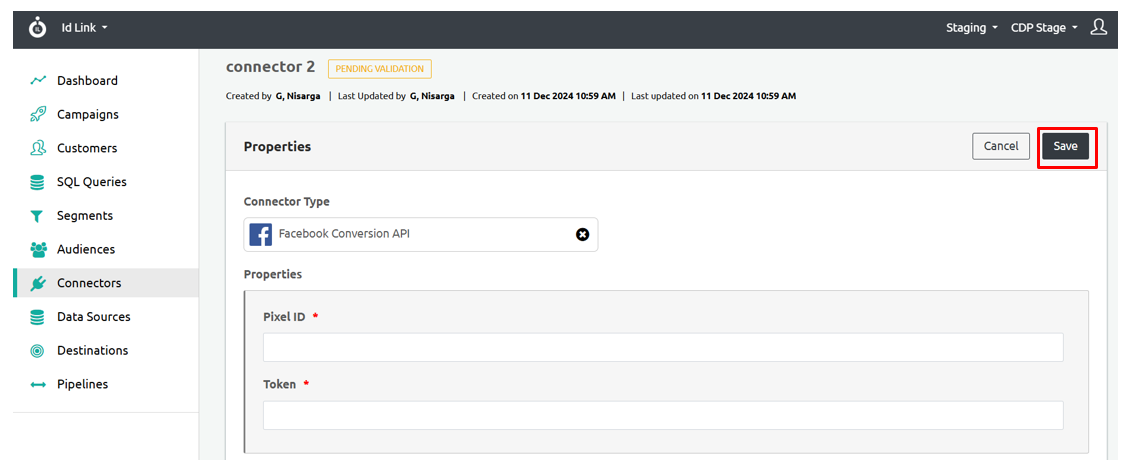
Connect Facebook Conversion API
To connect Facebook Conversion API, click Facebook Conversion API. The following fields will be available:
Pixel ID: Enter the appropriate Facebook Pixel ID.
Token: Enter the token associated with the Facebook Conversion API.
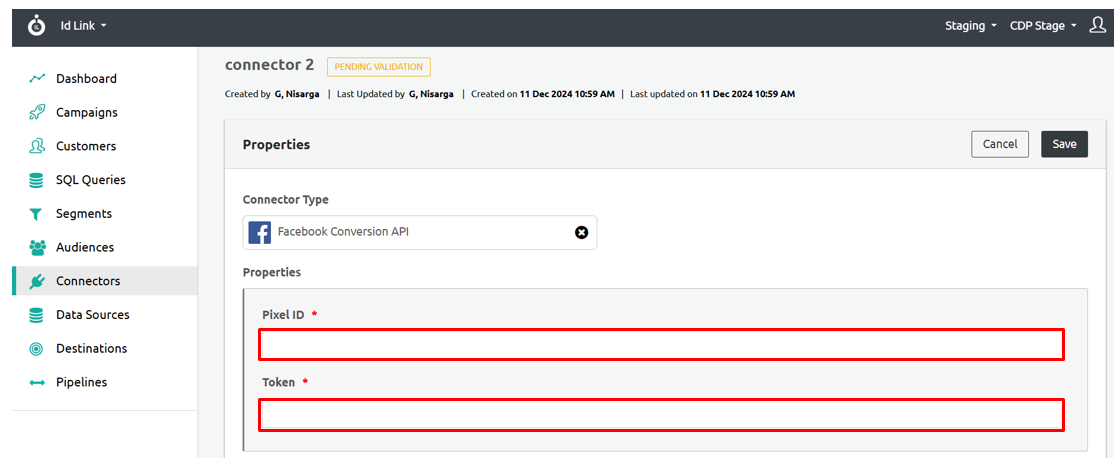
Click Save to save the changes.
Shopify
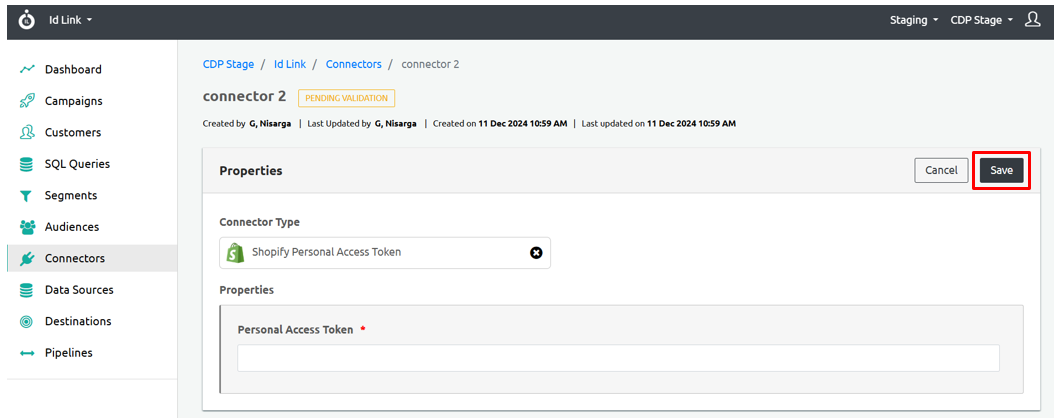
 Shopify Personal Access Token
To connect Shopify, click Shopify you will see the following field:
Personal Access Token: Enter the appropriate Personal Access Token for authentication.
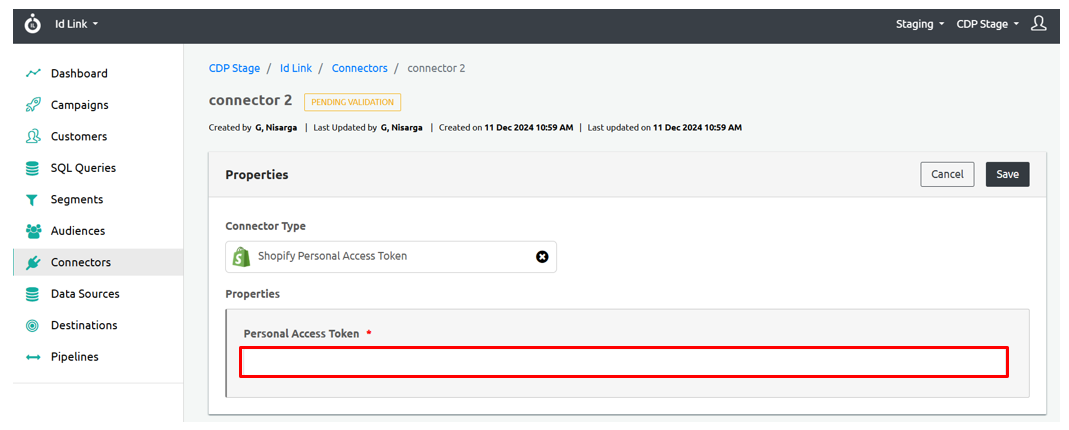
Click Save to save the changes.
 GA4 Measurement Protocol
To connect GA4 Measurement Protocol, click GA4 Measurement Protocol the following fields will be available:
Measurement ID: Enter the appropriate Measurement ID for your GA4 property.
Measurement Protocol Secret: Enter the appropriate Measurement Protocol Secret.
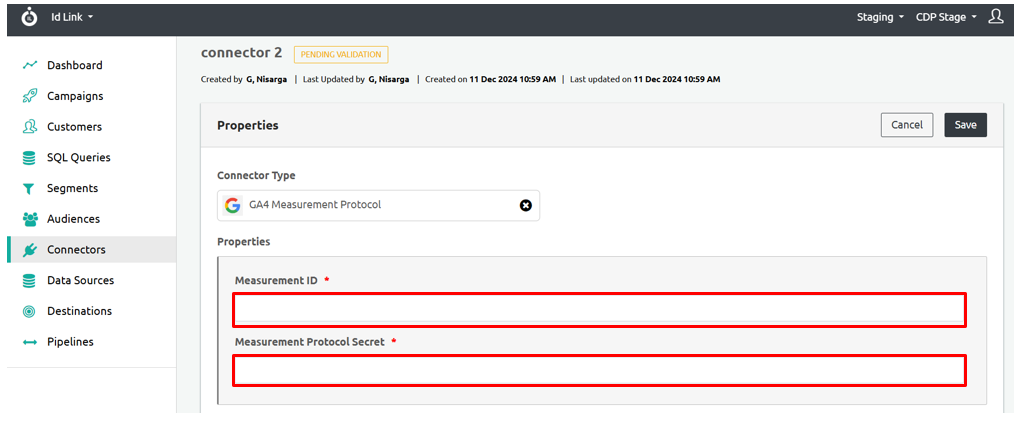
Click Save to save the changes.

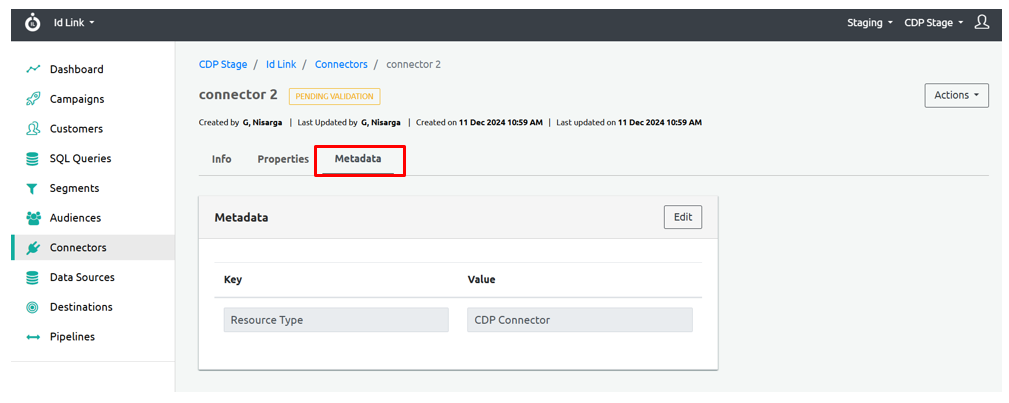
Step 6: Click Metadata.
Step 6.1: Click Edit.
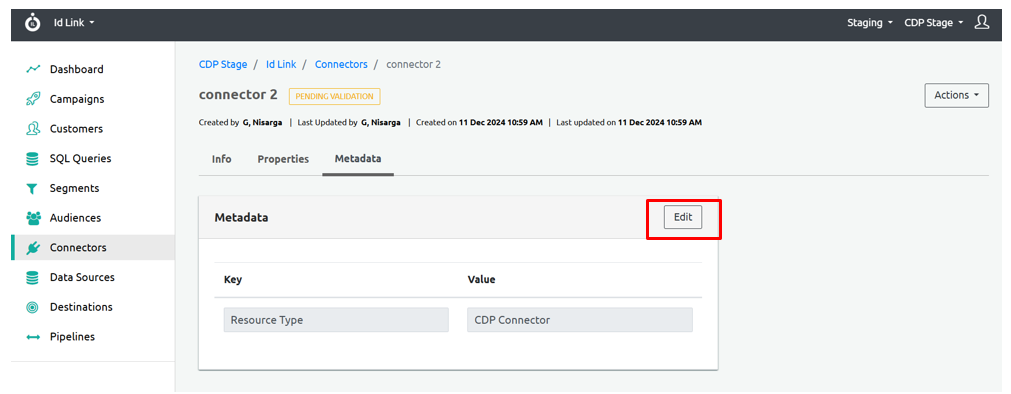
You will see two fields labelled Key and Value on the screen.
Step 6.2: Click the Add button to enable the input fields for the key and value.
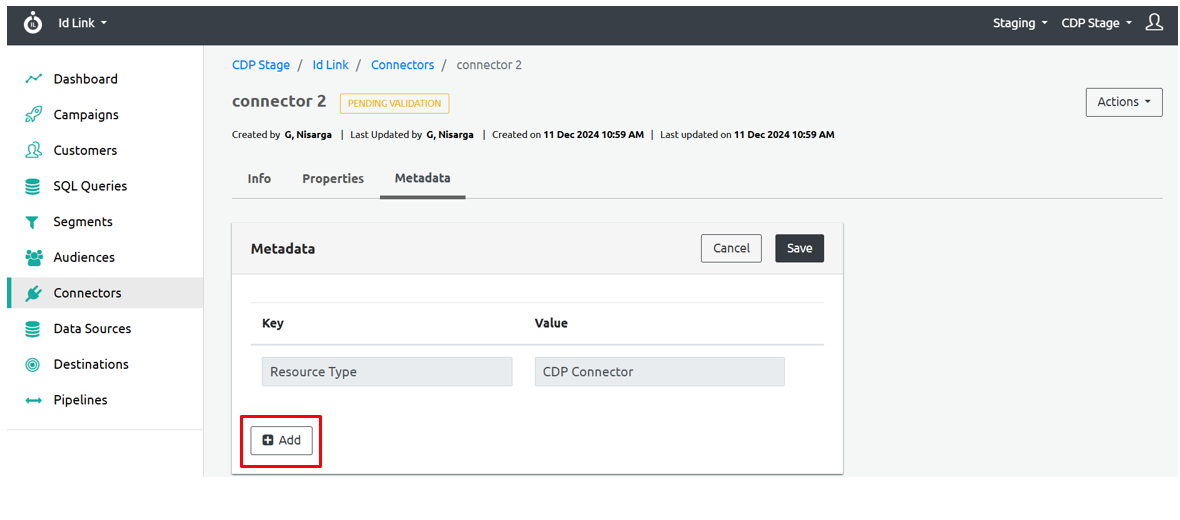
Step 6.3: Once the fields are activated, type the desired key in the Key field.
After entering the key, type the corresponding value in the Value field.
Note: The existing Value Destination will remain unchanged.You can add more keys and value destinations.
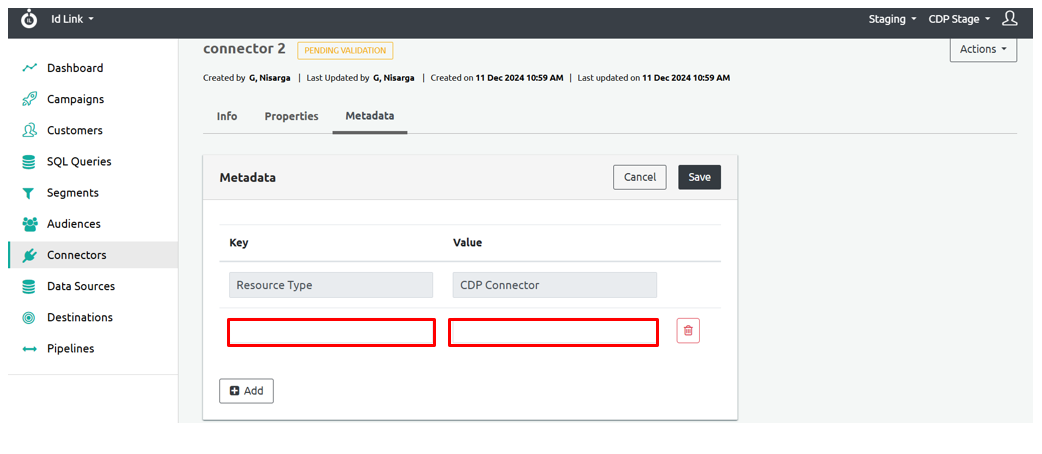
Note: To remove a key-value pair, click the Delete button next to the pair you want to delete.
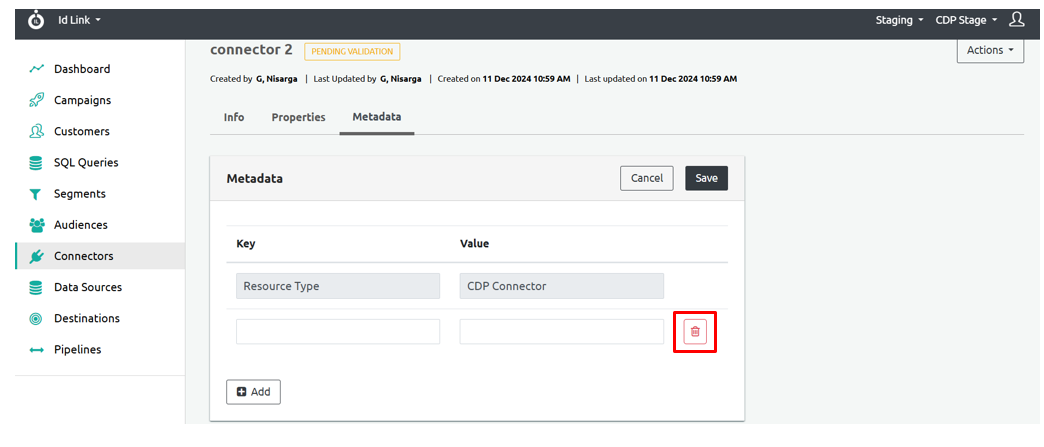
Step 6.4: Click Save to save the changes.