Add a Connector
To add a new connector, follow these steps:
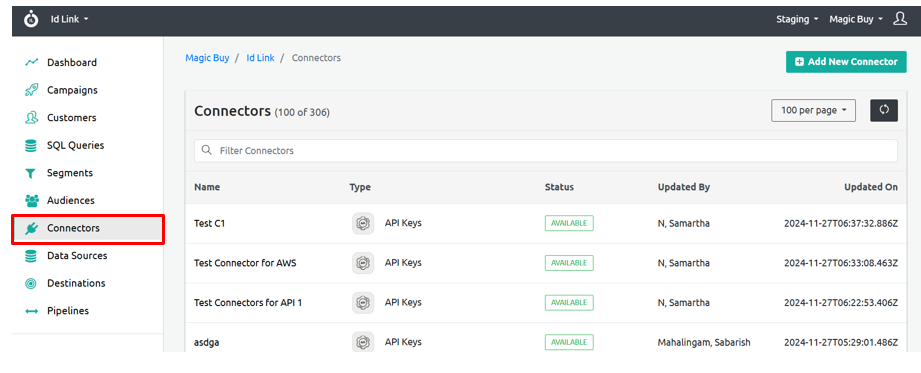
Step 1: In the left navigation panel, click Connectors.
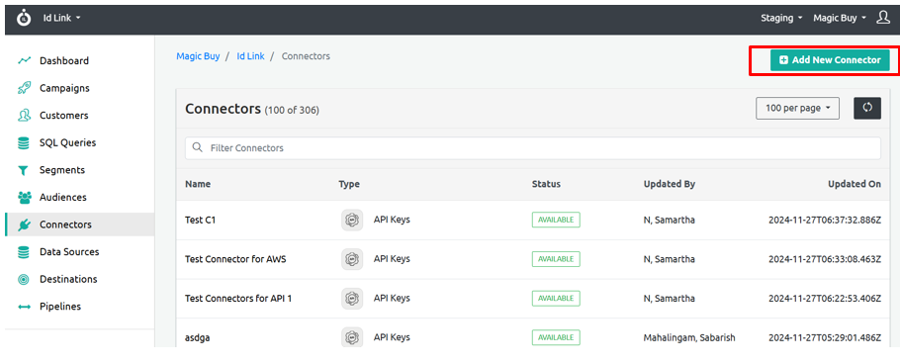
Step 2: Click Add New Connector located at the top-right corner of the screen.
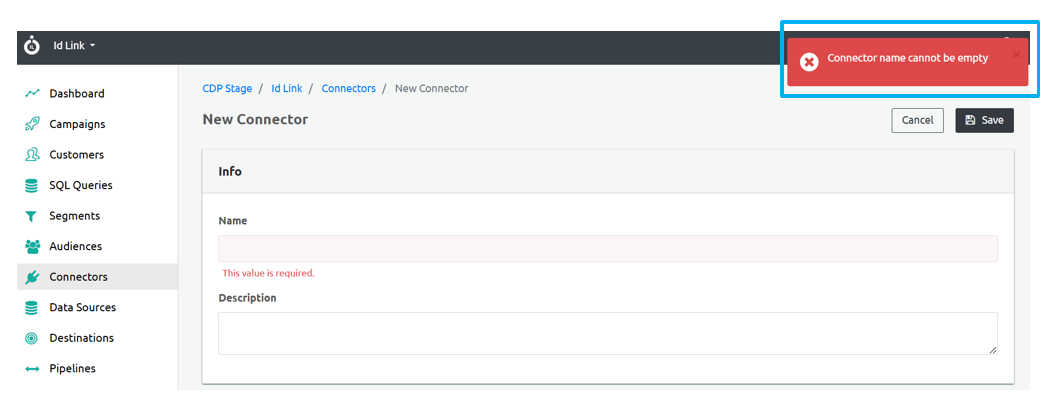
Step 3: In the Name field, enter the name of the connector.
Step 4: In the Description field, enter a brief description of the connector.

Note: The Name and Description fields are mandatory. If these fields are not filled in and you click the Save button, an error message will appear stating: Connector name cannot be empty.
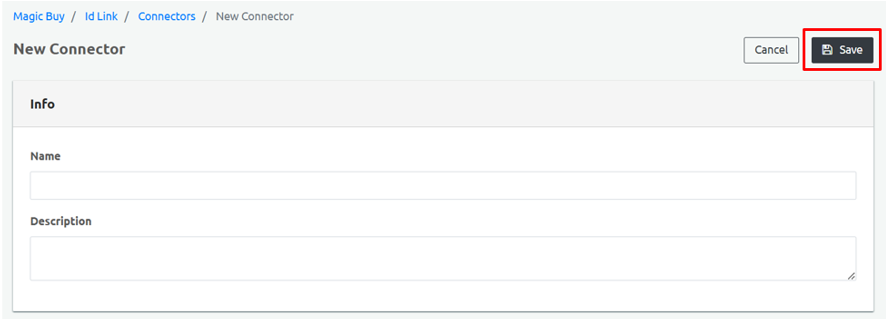
Step 5: Click the Save button located on the upper-right side of the screen.
Note: Click the Cancel button to discard changes.
Step 6: A confirmation popup will appear, stating Connector was created successfull, indicating that the connector has been successfully created.
